Customers
Print customer names and addresses to envelopes.
From the main menu bar, select
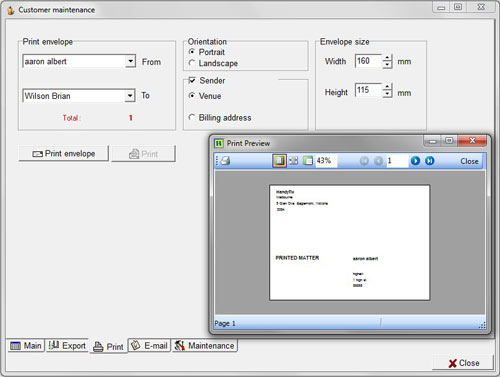
From the Customer maintenance window, click on the Print tab.

Select a customer name from the first (From) drop-down box to set the first name to be printed.
Select a customer name from the second (To) drop-down box to set the last name to be printed.
A Total number will appear below the names informing you how many envelopes will be printed.
Check either the Portrait or Landscape radio button to set the orientation of the envelopes being printed by your printer.
If you wish to include your organization name and address at the top left-hand corner of the envelope, check the Sender box.
Click on the Venue radio button if you want to show the organization's name and address or the Billing address radio button if you want to (also) print the company's billing address.
Click on the Print button and Print Preview screen will appear. If the layout is OK, click on the printer icon at the top left of the window. Your printer menu window will appear where you can make further settings if required.
Then click on the print button of your selected printer to print envelopes.
NOTE: Currently the system will only print addresses in the order Customer Name, City, Street Address, Zipcode/Postcode. An option to allow a change in this order will be included in a later upgrade of the ticketing program.

