Ticket Transactions
Group Sales
Sell a group of tickets and take a deposit with the balance being due by a specified date.
If no payment is received by the due date, the tickets will be automatically returned to the system for resale.
From the main menu bar, select
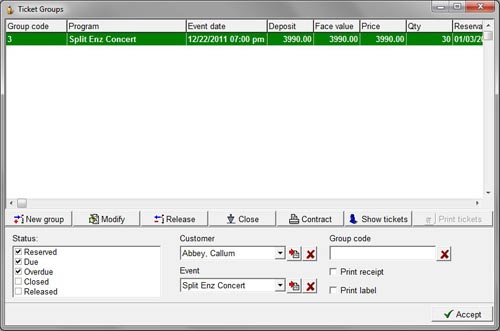
The opening window displays the list of current Group sales tickets issued.
Highlight a Group ticket sale by clicking on it.
In the Status box, check on either Reserved, Due, Overdue, Closed or Released to check its current status.
To display the tickets associated with the Group Sale, click on the Show Tickets button.
You can select Group sales which have already been recorded by:
| Event | select the Event from the drop down box |
| Customer | select the customer from the Customer drop down box |
| Group Code | enter the code in the Group Code box and hit Enter |
To sell a New group of tickets, click on the New Group button to open the main Browser window.
Select the event from which the tickets are to be sold.
Double click on the event to select which will bring up the seating chart.
Click on the required seats or surround the seats with a rectangle to select.
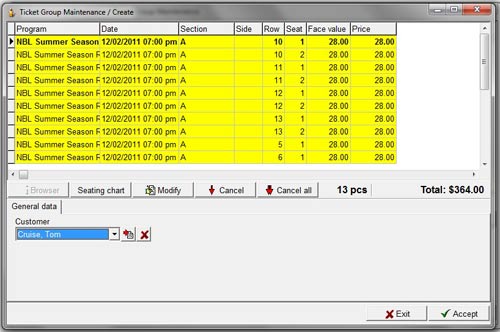
Click on OK and the Ticket group maintenance/Create window will appear with the tickets that you have selected showing in yellow.
Click the Modify button to Modify the prices of any or all of the tickets as required.
If you wish to modify only a single ticket, click on the specific ticket with your mouse.
The text on the ticket to be modified will be showing in white.
From the drop-down Rate box, check the All tickets box if you wish the rate to apply to all the tickets in the group or leave this box unchecked if the only ticket to which you wish to apply the new rate is the ticket that you have selected previously.
Click on the Save button.
From the Customer drop-down box, select the customer to whom the group tickets are being sold or enter a new customer name by clicking on the icon at the right of the Customer field.
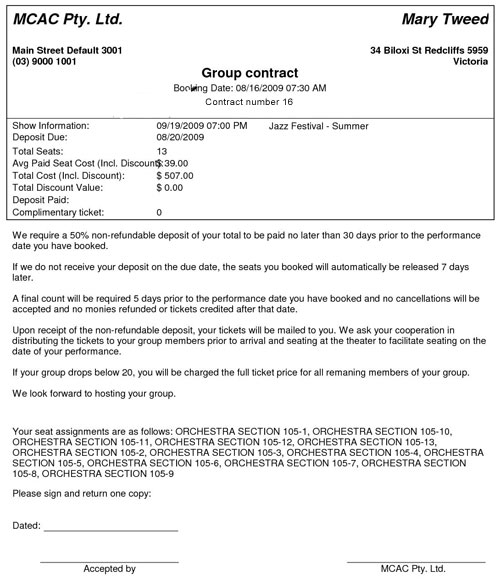
Click on the Accept button and immediately in your print preview screen, a Group contract will appear.
An example of typical Group contract is shown below.
....................................................................................................................................................
You can also print a copy of the Contract at any time by clicking on the Contract button in the Ticket Groups window.
NOTE: The default values shown on the Contract for % deposit, payable date, release date and final count date are set in the Stem3.sil file as explained in Maintenance > Venue > Group Sales Settings.
Click on the Show tickets button if you wish to see the tickets that have been selected.
Click on the Accept button.
To accept a payment from the customer, from the main Ticket Group Maintenance window select Modify.
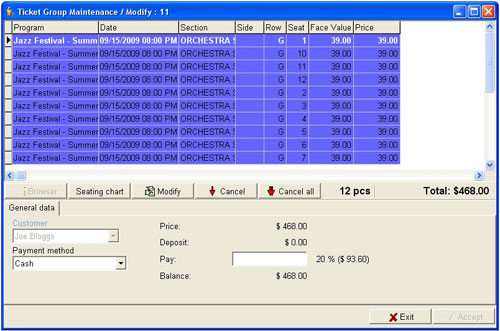
To receive a payment from the customer, select the payment method from the Payment Method drop down box.
Enter the amount being paid in the Pay field or click on the text to the right of this box which will appear in red text when you hover over it.
Clicking on the text will automatically enter the minimum required payment.
The Accept button should now be visible.
NOTE: The payment must equal the amount displayed at the right of the Pay field otherwise the system will not allow you to accept a payment.
Click on the Accept button to accept the payment and immediately in your Print Preview screen, an updated Group contract will appear showing the amount that has been paid as the deposit.
You will then be returned to the Ticket groups window.
The Group contract will look similar to the example shown above except the Deposit paid will now be shown.
To accept the final payment before releasing/printing the tickets, click on the Modify button.
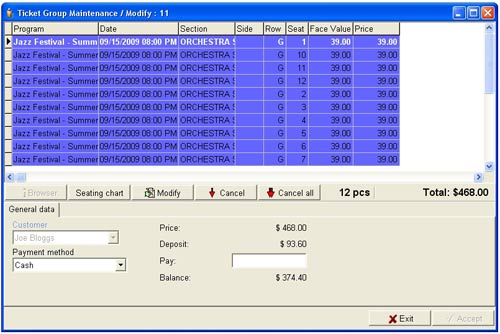
The amount due as the final payment will be displayed.
When you hover over this balance amount, the text will be shown in red.
Click on the balance amount and the figure will appear in the Pay field above.
The Accept button should now be visible.
Choose the payment method from the Payment Method drop down box, and click on the Accept button to accept the payment. Immediately in your Print Preview screen, an updated Group contract will appear, showing the amount that has been paid.
You will then be returned to the Ticket groups window.
The Group contract will look similar to the example shown above except the amount showing as Deposit paid will now equal the amount showing as Total Cost.
Click on the Close button to close the sale and the Ticket group maintenance/ Closing window will appear.
Click on the Accept button.
To print the Group tickets, check the Closed checkbox and the Print tickets button should become visible.
Click on the Print tickets button and the tickets will be immediately printed.
If you wish to release the tickets back into the system for resale, click on the Release button and the window Ticket group maintenance/release will appear.
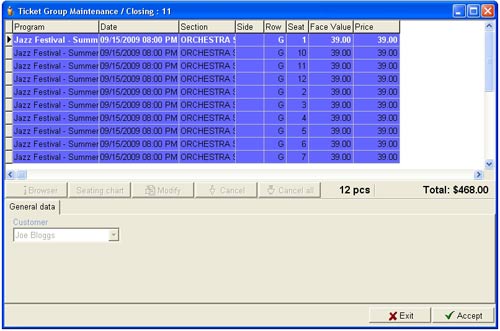
Click on the Accept button.
To check the status of any of the group of sales at any time on go to the Status box and choose either Reserved, Due, Overdue Closed or Released.
Then select the customer from the Customer drop-down box, and the relevant entry will be shown in the box above.

