Ticket Transactions
Allocate Tickets to Reseller
Allocate and print tickets to offline resellers.
The resellers may return unsold tickets up to a specified date prior to the event.
The system will automatically change the status of unreturned consigned tickets to Sold when this deadline is reached.
From the main menu bar, select
The main Browser widow will open.
Select the event and proceed to the seating chart where you can select the seat(s).
When finished selecting the seats, click on the OK button.
Alternatively use the Quick ticket function to add seats to the Cart.

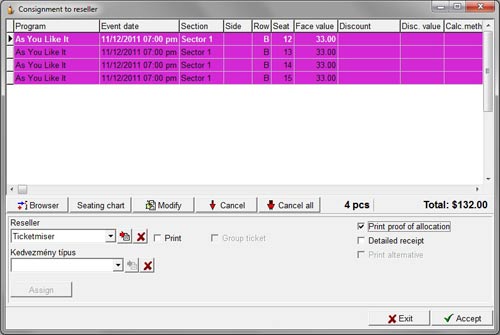
Select the reseller from the Reseller drop down list.
If the Reseller is not listed, click on the button with the red arrow at the right of the drop down box to go to Maintenance > Resellers, where you can enter details of the new reseller.
To modify the price of any the ticket(s), click on the Modify button.
If you wish to print a group ticket which issues a single ticket instead of individual tickets for each seat listed, check the Print checkbox.
If you wish to print the ticket(s) immediately, check the Print check box.
Leave it unchecked if you wish to print the tickets later.
Check the Print proof of allocation box if you wish to print a written summary of the ticket allocation.
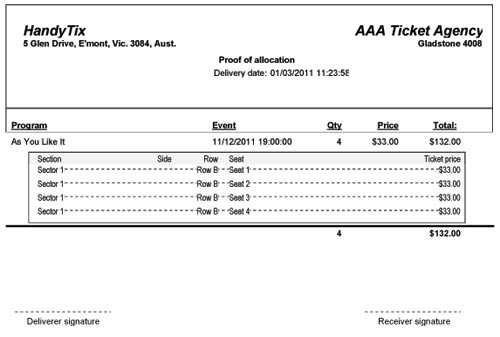
Check the Detailed receipt box if you wish the printout to show individual seat/row numbers of tickets allocated.
A typical Detailed Proof of Allocation is shown below.

Click on the Accept button to complete the transaction.
When the tickets are printed, the seats in the seating chart will turn brown (Printed
consigned status).
If the tickets are not printed, they will appear in purple on the chart (Allocated status).

